Showing posts with label diy. Show all posts

Tuesday, May 27, 2014

Quick Post: Floral Headband DIY

I recently made a floral headband using $5!

What you will need
  • floral tape
  • floral wire
  • flowers 
  • wire cutter
  • scissors
I picked up all of the supplies at a local dollar store. (I may have went flower crazy and spent a little more than $5.)

To create the headband, measure enough floral wire to wrap around around your head twice. The dollar store wire feels cheap, therefore I tried to create a thicker headband - you may not need to wrap the wire around twice. Then, wrap the floral tape around your wire, starting at the end to close the headband. 

Now for the flowers! You can pull the flowers off the stems, but I found it was easier to assemble the headband by cutting the stems shorter.
Arrange your flowers around the wire before taping them to the headband. 

If you find it difficult to attach the flowers with the tape you may want to use additional wire. Start by twisting the wire around the stem and then around the headband. Once your flower is attached, tape over the wire if needed to secure the flower in place. For the smaller flowers, I weaved the wire around the flower and headband. 


Hope you enjoyed this DIY!
Happy Spring! 

Sunday, April 27, 2014

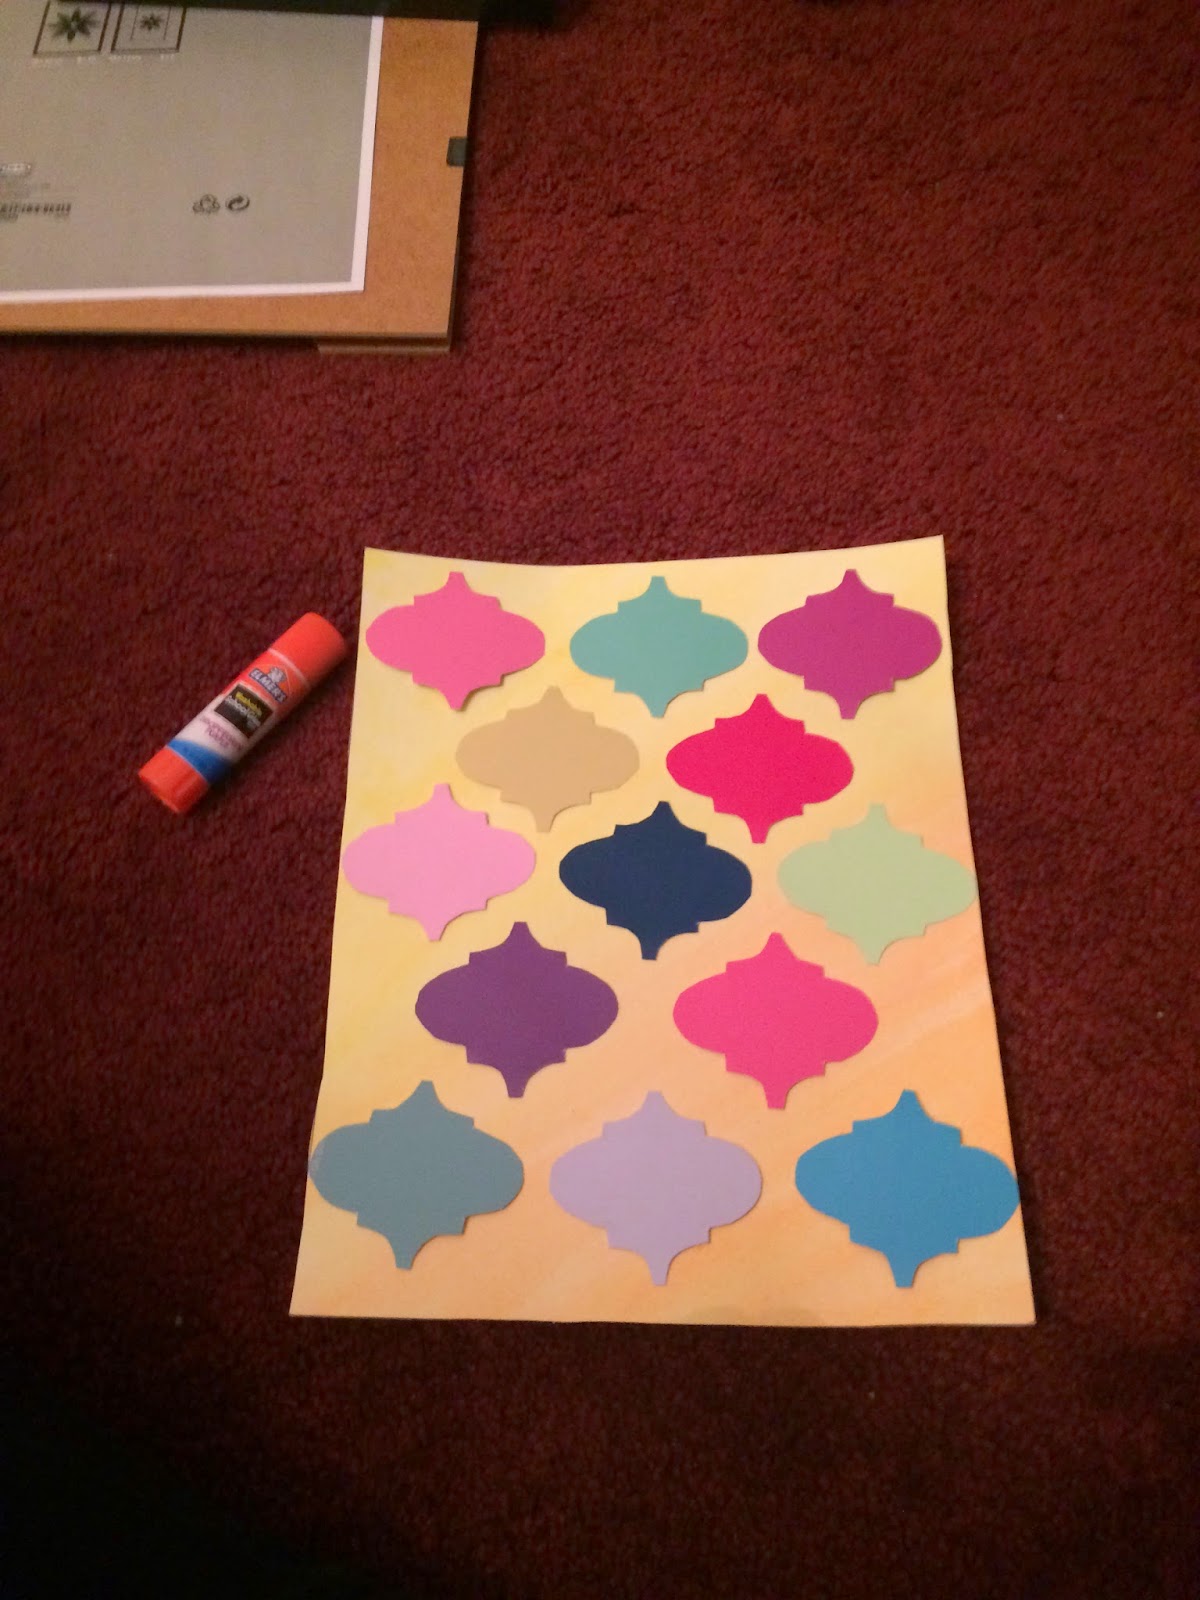
Moroccan Inspired Decor: Easy and Free

As I was walking through Walmart, I came across paint samples. My eyes lit up and of course my friend gave me a weird look, she doesn't understand. Anyway, I picked up a bunch of colors and convinced myself it was going to be worth it. In the end it was! I have been searching through Pinterest for Moroccan inspired living rooms and some how this project started.  

First take a look at the before...
I have been living here for almost a year so there is no excuse why I have empty frames throughout my apartment. 

After...
This doesn't complete my room but I love the addition. 

What you will need:

  • frame (mine is from Ikea)
  • paint chips
  • stencil
  • watercolors
  • watercolor paper (thick paper)
  • glue
  • scissors
And so the process begins...

 I traced this stencil onto an index card straight from my laptop screen. I used the smallest shape, you know the one inside the black one. Stencil HERE! Found her DIY on Pinterest. Her project came out amazing! Check it out!
 I traced the design on the backs of the paint chips. I found out a little too late in the game that tracing with a pen was much quicker.


 Just fitting it to the frame to make sure I had enough.

 I blended the yellows and oranges.
After the paint dried, I traced the white frame that came in the picture frame and then cut my paper to size. You can also use the back piece of the frame. 

 I like the first arrangement better, oh well.

GLUED AND FRAMED! Tada! 
You can totally jazz it up by using it as a background for pictures or adding a quote on the glass. I haven't decided what to do with it yet. 

Adios! Hope you enjoyed this pictorial!


There might be a recipe coming soon. Stay tuned. 


Sunday, December 29, 2013

New Years Photo Booth Props - DIY

Happy Sunday! In preparation for New Year's Eve I wanted to share the process of this home photo booth I have in mind.

The first thing I did was turn to Google. I found some props and traced them onto paper off my iPad. 

After , I retraced them with a Sharpie. I want to use these as stencils to later trace on to something that is more sturdy.  I "laminated" them with clear tape and cut them. 
With a precision knife I will cut out the lens, clean up the numbers and cut the champagne in the glass.

I haven't decided if I want to use card stock, foam or cardboard for the props. Once I put the props together, I will glue or tape the prop to a dowel rod. 

What's a photo booth without pictures to take home! 


:) 

Tuesday, December 24, 2013

Countdown til Christmas - On A Budget

With a few hours left!! Merry Christmas! I wanted to share affordable and personalized  last minute gift ideas.


I bought 4 microwavable mugs for $5 at Deals. Used sharpies to decorate them. Baked them at 350 degrees for 30 minutes and filled them with goodies.


Searching through the Target Dollar Section I found an ice tray with trees and snowflakes. I melted down a candle (using the double boiler method) and poured it into the molds. After they cooled, I put them into a little zip lock and paired it with a tea light wax burner.


HAVE A VERY MERRY CHRISTMAS!


Sunday, December 22, 2013

Countdown til Christmas- DIY Candles

Attention last minute shoppers! I found this video on YouTube randomly. How cute are those hot chocolate candles. I immediately went to Michaels and bought some candle supplies. I didn't measure any of my ingredients. I mostly eyeballed it and manipulated it to get the color I wanted. I went a little bit candle crazy and tried a bunch of different things.

What you will need:
  • Soy wax - It melts quickly and can be melted on the stove or in the microwave
  • Crayons - optional. Some people don't like using crayons for color because it can clog the wick
  • Wicks- Use a soy wick for soy wax preferably
  • Skewers for mixing
  • Color blocks
  • Scent blocks, scented oil or an old candle
  • Mugs, or other glasses
  • Thermometer - optional. My set came with it.
**In the video she used shortening to make her candles instead of soy wax. I didn't have any on hand and didn't go buy any but it is on my to do list. 

Let's start with the Caramel Latte Candle - that smells like vanilla lol. You can start by gluing your wick to the bottom of the glass, I didn't. After you glue it to the bottom you can straighten your wick with two pens. I wanted to hold the wick in while I poured the wax into the cup but it didn't seem to work. So if you decide not to use glue then save the wick until after you pour the wax into the glass.


To create the coffee I used a microwave safe bowl. I put about 5 handfuls of soy wax, a  few pieces of brown and black crayons, and a piece of the vanilla scent block. I put it in the microwave and mixed it with the skewer in one minute intervals until the wax, crayons and scent were fully liquefied. I had to go back and forth with wax and adjusting the color.
**When cleaning the bowl make sure the bowl is still warm and you use hot water. Take a napkin and wipe the bowl first and then wash it. 
**If you are using oil put a few drops after the wax is melted.
Once it is the color I was looking for I poured it into the mug. Then I put the wick in the center and held the wick up by placing it in between two pens. I let my wax cool for a while- perfect time to get lost on Netflix or leave it overnight! Once it looked try I started the next layer...whipped cream. I put a handful of the soy wax into a bowl and put it in the microwave for a minute and a half to two minutes. 
I added more wax after I took the the bowl out the microwave and mixed it until most of the pieces were dissolved.
I let it sit for a couple of minutes so it can thicken/harden up a little. Then, I used a spoon and put the topping around the wick. TA DA! 

Now for the caramel syrup! I used crayons for this and melted orange, apricot, and blue. (There were probably other colors like yellow, too.) It was tricky to get the right brown.  I took the spoon again and drizzled it over the whipped topping. Then, I cut the wick. Fin!
**If you want to test the color dip a toothpick into the wax and place the melted wax on a paper towel. The wax will cool into a lighter color and that is the color the wax will be when it is cooled down.


This next candle, the Martini Candle, was really easy! I only used  three things. A martini glass, an old candle and a wick. (You can use the wick from the old candle if it is long enough.) I used the double boiler method to melt the wax. I took the Cherry Pie candle and put it in hot water over a low flame. I ended up adding more water to match the height of the wax. 
After the wax melted I poured it into the martini glass and put the wick inside. I used pens to hold the wick in place and let the wax cool over night. When it's set I cut the wick. 

Finally, the Hot Chocolate Candle! Soooo I didn't have any more brown crayons but I did have more of the Cherry Pie Candle left. How hard could it be to turn the deep red color into brown...hmph! Well, I used the double boiler method again and melted the candle and removed the wick. I then poured the wax into the mug, which wasn't enough. Now for the experimenting - I put a piece of the blue dye and yellow dye into the glass and some soy wax. 
I melted it down and then poured it into the mug. I continued until the wax turned into a reddish brown. I let the candle cool for a few hours. 
Now, the whipped cream again. This time I decided to do it a bit differently. I melted a handful of wax and vanilla scent together until it became a liquid. 


 It wasn't enough so I added more soy wax and took the glass out of the water. I mixed the soy chips into the wax and then let it sit for like 3 minutes. Once it started to turn white again I started to mix it quickly. The wax started thickening. It looked a lot smoother than the last time I did it but not as thick. I used a spoon to put it on top of the hot chocolate. I let it cool for an hour or so. It looked much fluffier and whipped when it dried.

Next, I made the chocolate syrup - more color experimenting. I cut red, blue and yellow pieces. I mixed it with a little bit of soy wax. I experimented with the color until it looked chocolaty. Then, I drizzled it over the whipped cream with a spoon.

MARSHMALLOW TIME I put a little bit of soy wax into a plastic cup and put it into the microwave for about a minute.
 I just wanted it to be warm enough to mold. I took small pieces and shaped into little cylinders. I placed them randomly on top and then drizzled some more chocolate over them. HOT CHOCOLATE IS DONE!


HERE ARE THE OTHER FINISHED CANDLES!

P.S. Don't burn the martini with the umbrella. 

YUMMY! It was so much fun. I read a bunch of different sites - some said to let the candle cure for 24hrs, one week or two weeks to get the full scent. Also, I have read to let the wax cool a bit before adding the scent because then it will be stronger. 

Hope this was helpful. Have a safe and happy holiday! :) 

Wednesday, July 17, 2013

Beat The Heat!

It's pretty HOT in New York! (Hot might be an understatement.)  So I've been looking around on Pinterest and other blogs and found some summer activities to stay cool! 

 Indoor Bubble Blowing!


Play Create Explore's site has a bunch of fun ideas! One being indoor bubble blowing. All you have to do is get a bowl add some washable paint and dish detergent to warm water. Oh, and don't forget the straws.

But Fun Baths has to be my favorite idea. Giving your child a new fun themed bath every once in awhile is a good way to extend knowledge through exploration!

Build a Sand Castle!
Make "Moon Sand" using the recipe provided by Sherry and Donna for days you can't make it to the beach. Cover it and save it for another day!

Put on Your Bathing Suits!
Hit the park and run through the sprinklers, fill up some water balloons or check out Clumst Crafter's Water Blob Tutorial. She also posted a simple D.I.Y. for staying cool and having lots of fun - Water Bombs. It is so much easier than refilling water balloons!

Sidewalk Creativity!
Growing a Jeweled Rose posted the ingredients for Chalk Splat! Watch what happens when you spray some vinegar on your artwork. There are also a bunch of other sidewalk art ideas featured on the post. 
Through Pinterest I found another summer activity  - Ice Chalk. And there are a bunch of ways you can have fun with it. Like color mixing...

Playing With Food!
Get your pasta and create Octo-Ice! Great for sensory play and it's something different! 
Crystal provided other sensory play ideas and I am loving the Freezy Dough! It's great because you can extend learning through pretend play! 


Shells and Play Dough
Make your own play dough using some flour, salt and water for practicing motor skills. Add some food coloring or kool-aid for colored play dough. Add some summer themed toys like shells and dolphins
Or create Beach Dough Creatures! It's really cute!

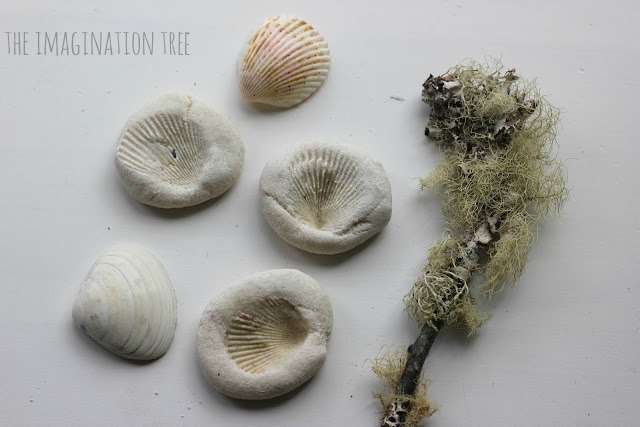
If you bake the dough you can make Shell Imprint Fossils.

Build a Tent and Camp!

Check out some Camping Themed Activities.
Simple Little Home went all out on an indoor camping experience! I love that some learning activities are included in all the fun. 
Too busy gazing at the stars? How about learning about constellations and creating Marshmallow Constellations!
Or HAVE AN INDOOR CAMPING PARTY! I love this! 

Ice Cream!!
What better way to stay cool in the summer than ICE CREAM! Make Ice Cream in a bag! This looks like a fun and easy experiment.

I made an Ice Cream color activity for secondary colors. Make red, blue and yellow ice cream scoops and brown, orange, purple, and green cones. (I'd highly suggest laminating them, so they are durable.)

Ice Cream Dough! Great for pretend play! And it looks so real! 
 
More pretend play by using this tutorial to make an Ice Cream Play Set! And a color matching game!


I am fully aware of the overuse of exclamation points! I couldn't help myself. Happy Summer! 


** I used Dreamlike Magic and Ashley Hughes clipart.